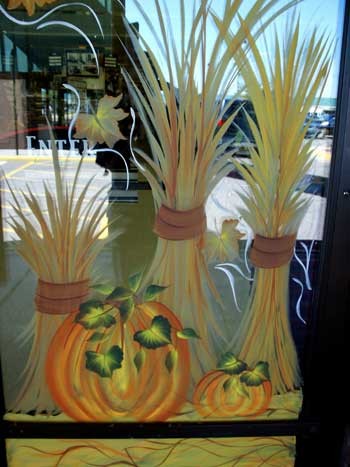
I received a lot of positive comments about my first article about One Stroke Decorative Painting on Windows, but it also has generated many additional questions. I will try to answer those here.
Tip 1 – Floating Medium and Clear Medium

First, I want to mention the use of floating medium (for acrylic paint) and Clear Medium (for the enamels). As you may be aware, floating medium is a clear pigment gel that is used with your Folk Art acrylic paint and helps the paint flow more smoothly; making the paint easier to work with on any surface, including windows. Be aware, however, that it also changes the consistency of the paint depending on how much you use. The more floating medium that is used; the more transparent the paint becomes. Again, the floating medium is only for use with the Folk Art acrylic paint. If you are using the enamel paint, then you would use the enamel clear medium. It works the same as the floating medium, but is specially designed for use with the Folk Art Enamel paint.
When I use the floating medium, I have my paintbrush loaded with paint and then work the floating/clear medium into the paint. Add more floating/clear medium as needed to help the paint flow smoothly on the glass. You will notice a big difference in how the paint flows as compared to using the paint without the floating/clear medium.
Tip 2 – Getting Good Paint Coverage on Glass
On your first layer (color), since you are painting directly on the glass, you can add paint to the surface to make it more opaque and get better coverage. After the first layer dries, then you can add another layer (color) on top of the first. However, you will not be able to work with the paint like you did with the first layer. The first layer of paint will begin to come off and get sloppy if you work the second layer too much. In my experience, it is best to load your brush with a lot of paint and stroke over the first layer only one time.
Tip 3 – Removing a Painted Design
If you want to remove a painted design from a window, there are two methods that I use; both are a bit messy. The first involves using a razor blade to scrape the paint from the surface of the window. This produces a lot of paint chips and flakes. The other method is to use lukewarm water with soap (the soap is optional) with some rags or paper towels to clean the window. This is also messy because the paint smears everywhere. Once the paint is removed, I use glass cleaner to remove any remaining paint residue. You can also use a combination of these two methods by scraping some of the paint off, then washing off the remainder.
Tip 4 – How Much Should I Charge to Paint a Window?
Unfortuately, there’s no easy answer to this often asked question. The best advice I can give is to first consider the following questions:
- What is the income level of the area where you live compared to other parts of your state or country? (Almost everything costs more in New York City than in a small midwestern town.)
- Is the design permanent or temporary?
- How many colors will you use?
- How big (or small) is the design?
- Does the design have a lot of detail, or is it simple?
- Is the design a mural or picture, or is it a border?
- Will you have to stand on a tall ladder all day, or is the design to be painted near ground or floor level?
Once you quote a price to a customer, you can always negotiate or lower the price by simplifying the design — fewer colors, smaller design, less details, etc. Always remember, you should charge what you think your painting is worth, and there will always be someone who thinks your quoted price is too much, no matter how high or low.
This article © 2005 Crystal Short, All Rights Reserved.
